Oct 02 2010

Halloween Candy Wrapper

Published by under 3D Projects,Stampin'

I just love my Big Shot and I love these Halloween treats made with the Bigz Candy Wrapper die. So simple and so cool!

Stamps: None
Paper: Whisper White, Pear Pizzazz, Basic Black, Basic Gray, Pumpkin Pie, Nite Owl Designer Series Paper
Ink: None
Accessories: Big Shot Die-Cut Machine, Basic Black 3/8 inch Taffeta Ribbon, Spooky Night Rub-Ons, Scallop Oval Punch, Bigz Candy Wrapper Die & stampin dimensionals

Purchase everything you need to create this project by clicking here. Project and image © 2010 Stampin’ Up!®

No responses yet

Sep 17 2010

Vintage Angel Cards

Published by under Cards,Stampin'

Here’s one of the cards we made at my downline meeting last week. I got the idea for the angel when I saw a pix of one that was posted on the boards at the SU Ft. Worth regionals. I thought it was so cute and just had to make one.

Stamps: Many Merry Messages
Paper: Real Red, Old Olive, Very Vanilla, Shimmery White, Chocolate Chip, Brushed Gold
Ink: Chocolate Chip, Blushing Bride
Accessories: Real Red 5/8 Grosgrain Ribbon, Whisper White 1/4 Grosgrain Ribbon, Mini Glue Dots, 3/4″ Circle Punch, 1″ Circle Punch, 1 1/4″ Circle Punch, 1 3/8″ Circle Punch, 2 1/2″ Circle Punch, Butterfly Punch, Ornament Punch, Big Shot Die-Cut Machine, Texturz Plate, Stampin Dimensionals, stamping sponge.

I made another angel card using the Deck The Halls designer series paper in the Holiday Mini. I changed the colors to coordinate with the dsp.

angelcard_vintagedsp_100914.JPG

Stamps: Many Merry Messages
Paper: Cherry Cobbler, Always Artichoke, Very Vanilla, Shimmery White, Chocolate Chip, Brushed Gold
Ink: Chocolate Chip, Blushing Bride
Accessories: Chocolate Chip 5/8 Grosgrain Ribbon*, Always Artichoke 1/4 Grosgrain Ribbon, Mini Glue Dots, 3/4″ Circle Punch, 1″ Circle Punch, 1 1/4″ Circle Punch, 1 3/8″ Circle Punch, 2 1/2″ Circle Punch, Butterfly Punch, Ornament Punch, Stampin Dimensionals, stamping sponge.

*This ribbon is retired…substitute Early Espresso 5/8 Grosgrain Ribbon.

Purchase everything you need to create this project by clicking here.

2 responses so far

Sep 01 2010

Holiday Mini is here!

Published by under Stampin'

The exciting Holiday Mini Catalog is here, and is filled with brand-new stamp sets, accessories, dies, and more! Click the icon below to download the pdf version or shop now in my Online Store.

No responses yet

Aug 26 2010

Thank You Card

Published by under Cards,Stampin'

A hug from a friend is one of the greatest blessings. Extend one to each of your closest friends with this image from The Nicest Things set. Framed in a scallop oval and matted with a polka-dot embossed background, this piece of watercolor art will convey your warmth and sincerity perfectly.

Stamps: The Nicest Things, Curly Cute
Paper: Confetti White, Crumb Cake, Daffodil Delight, Early Espresso, Poppy Parade
Ink: Crumb Cake, Daffodil Delight, Early Espresso, Old Olive, Pear Pizzazz, Poppy Parade
Accessories: Aqua Painter, Color Spritzer Tool, Oval Scallop Frame Bigz Die, Perfect Polka Dots Textured Impressions Embossing Folder Die, Big Shot Die-Cut Machine, Stampin Dimensionals, Soft Subtles Brads

Purchase everything you need to create this project by clicking here. Project and image © 2010 Stampin’ Up!®

One response so far

Aug 21 2010

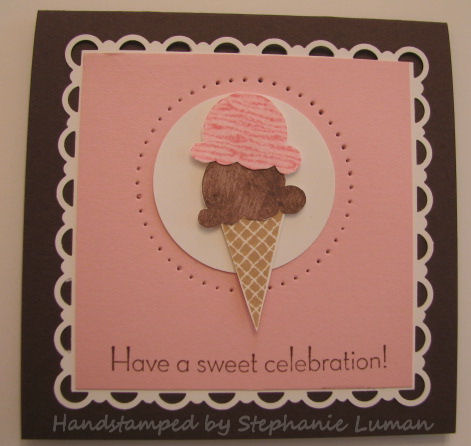
Cupcake Gift Card Holder

Published by under 3D Projects,Cards,Stampin'

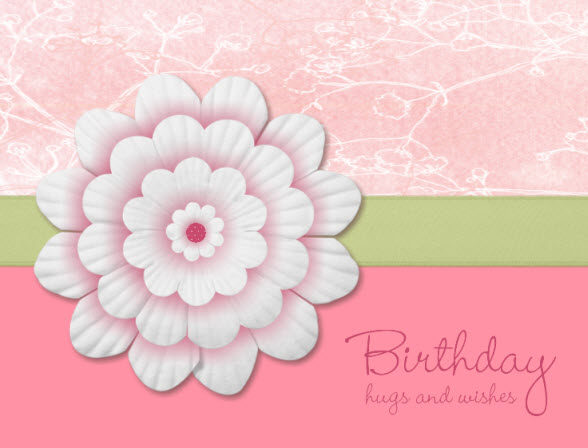
Create this playful project to help celebrate the birthday of a cherished one and take up the birthday mirth a notch or two.

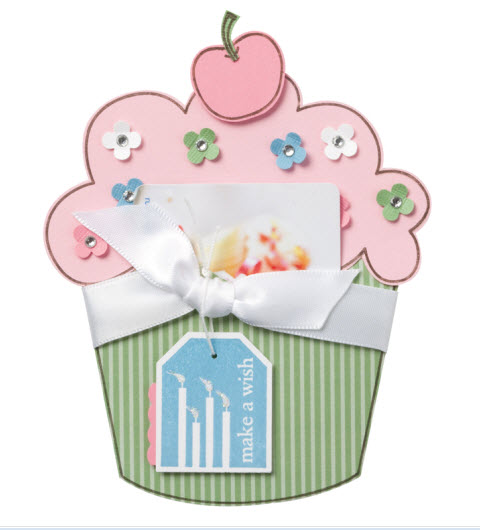
Stamps: Birthday Bliss, Simple Birthday Thanks
Paper: Pretty In Pink, Whisper White, 12×12 Textured Cardstock – Brights Collection, 12×12 Textured Cardstock – Subtles Collection
Ink: Marina Mist, Early Espresso Marker
Accessories: Whisper White 5/8 inch satin ribbon, basic rhinestones jewel accents, Dazzling Diamonds stampin glitter, Dotted Scallop Ribbon border punch, 1/16 handheld circle punch, itty bitty shapes punch, stampin dimensionals

Purchase everything you need to create this project by clicking here. Project and image © 2010 Stampin’ Up!®

No responses yet

Aug 14 2010

Daisies & Chubby Cheek’d Giggles (MDS 12×12)

I’m digiscrappin’ today…just love these pixs of my Mom and niece, Megan. I giggle out loud every time I look at them. There’s just something about a laughing baby with chubby cheeks. Makes my heart bounce. Of course, my obsession with paper daisies continues:

Stamp Brush Set: Cheep Talk, Torn Edges – Eyelet Border
Paper: Pretty in Pink, Chocolate Chip, Early Espresso, Very Vanilla, Blushing Bride, Chocolate Chip Large Polka Dot DSP
Ink: Early Espresso
Accessories: Paper Daisies Digital Kit, Pretty In Pink Satin Ribbon

No responses yet

Aug 08 2010

Paper Daisies Digital Kit

I’m having fun playing around with My Digital Studio today. Last night I purchased the Paper Daisies digital kit and I can’t stop playing with them! One thing I love about MDS is being able to download new SU! goodies within minutes…instant gratification. I’ve added the daisy I created to my new blog header and matching buttons. What do you think?

You can purchase the Paper Daisies digital kit in my Stampin’ Up! store. Just search for item #121432. They are only $3.95 and include four different sizes. You’ll notice I’ve added color to each layer. Here’s a step-by-step tutorial to get that look:

    Step 1: In the Design Center window, click on embellishments > add embellishment
    Step 2: Click on Paper Daisies under the category list
    Step 3: In the Preview Window, click Paper Daises – flower 1 and click the Apply button
    Step 4: Repeat step 3 for each flower
    Step 5: Close the embellishment window and you should see all four flowers layered on your project. The smallest one will be selected.
    Step 6: In the Design Center window, click on Drop Shadow. Change Opacity to 100% and Blur to Full. In the preview window, use your mouse to click and drag the shadow so it’s centered under the daisy. To add color, click on the Change button. Make a color selection, I chose Rose Red. Click the OK button.
    Step 7: Repeat step 6 for each flower layer except the bottom one.

I also added a brad in the middle. To do this, repeat steps 1 thru 3 except choose Brads from the category list. Click and drag it to the center of your flower. Once you have your flower finished, you can group all the layers together and then you can move the whole flower around on your project without having to re-assemble it. To do a grouping follow these steps:

    Click on the brad to select it. Hold down the Ctrl key and click on all the remaining layers. Press Ctrl-G. All layers are now grouped.

I also created a birthday card. I switched out the brad for a circle filled with DSP…

paperdaisycard100808b.jpg

Stamp Brush Set: Hugs & Wishes
Paper: Shades of Spring (Pattern 4) DSP, Rose Red Small Polka Dot (center of flower), Regal Rose
Ink: Rose Red
Accessories: Paper Daisies Digital Kit, Certainly Celery Satin Ribbon

2 responses so far

Aug 05 2010

Let It Snow Card

Published by under Cards

A Sweet Treat cup filled with snow-like Chunky Stampin’ Up!® Glitter isn’t the only charming and unique feature of this card. The snowman’s arms were created with ease using the Snowflake punch–simply punch out one snowflake, then trim the edges to create sticks.

Stamps: Big On Christmas
Paper: Confetti White, Crumb Cake, Pear Pizzazz, 12×12 Textured Cardstock: Subtles Collection
Ink: Baha Breeze, Basic Black, Basic Gray, Old Olive, Pear Pizzazz, Pumpkin Pie, Real Red
Accessories: Chunky Essentials Stampin’ Glitter, Old Olive 3/8 Inch Taffeta Ribbon, Sweet Treat Cups, Stampin’ Dimensionals, Aqua Painter, Snowflake Punch, 1 3/4 Circle Punch, Paper Piercer, Matt Pack

Purchase everything you need to create this project by clicking here. Project and image © 2010 Stampin’ Up!®

One response so far

Aug 01 2010

4 You Pillow Box

Published by under 3D Projects,Stampin'

Stamps: Dot, Dot, Dot; Tiny Tags
Paper: Baja Breeze, Cherry Cobbler, Early Espresso, Soft Suede, Very Vanilla, Neutrals Patterns DSP
Ink: Baja Breeze, Old Olive
Accessories: Linen Thread, Stampin’ Dimensionals, Jewelry Tag Punch, Two-Step Owl Punch, Big Shot, Pillow Box Bigz Die

Purchase everything you need to create this project by clicking the “shop online now” button.
Project and image © 2010 Stampin’ Up!®

No responses yet

Jul 26 2010

Friends Fur-ever & Cheep Talkin’ Owls

Published by under Cards

I’m playing with all my goodies from the new catalog. I just love the Friends Fur-ever set…those puppies are so cute! Here’s the card I created with them. Not my usual style or colors but I think I like it:

Stamps: Friends Fur-ever
Paper: Tempting Turquoise, Real Red, Whisper White, Crumb Cake, Basic Black
Ink: Basic Black, Chocolate Chip, Crumb Cake, Daffodil Delight
Accessories: Whisper White Grosgrain Ribbon, Crimper, Scallop Trim Border Punch, Stamp-a-ma-jig

Here’s a card I made with the new Owl punch…I can tell I’m going to have a serious addiction with that one! It goes perfectly with the Cheep Talk stamp set.

Stamps: Cheep Talk
Paper: Chocolate Chip, Pumpkin Pie, Very Vanilla, Whisper White, Pretty In Pink, Chocolate Chip DSP, Pumpkin Pie DSP
Ink: Certainly Celery
Accessories: 2-Step Owl Punch, 5/8 inch Grosgrain Ribbon, Eyelet Border Punch

Purchase everything you need to create these projects by clicking the “shop online now” button.

One response so far

« Newer Entries - Older Entries »